The Examples Book
Introduction
This book contains a collection of examples that students can use to reinforce topics learned in The Data Mine seminar. It is an excellent resource for students to learn what they need to know in order to solve The Data Mine projects.
How to contribute
There are a variety of ways to make a contribution to this book. For simplicity, we will illustrate the method that we find most user friendly.
Setup GitHub Desktop and clone the repository
The first step in making a contribution to The Examples Book is to setup and install GitHub Desktop and clone our repository. These steps only need to be performed once on a system to have things configured to make contributions.
- Setup GitHub Desktop following the directions here.
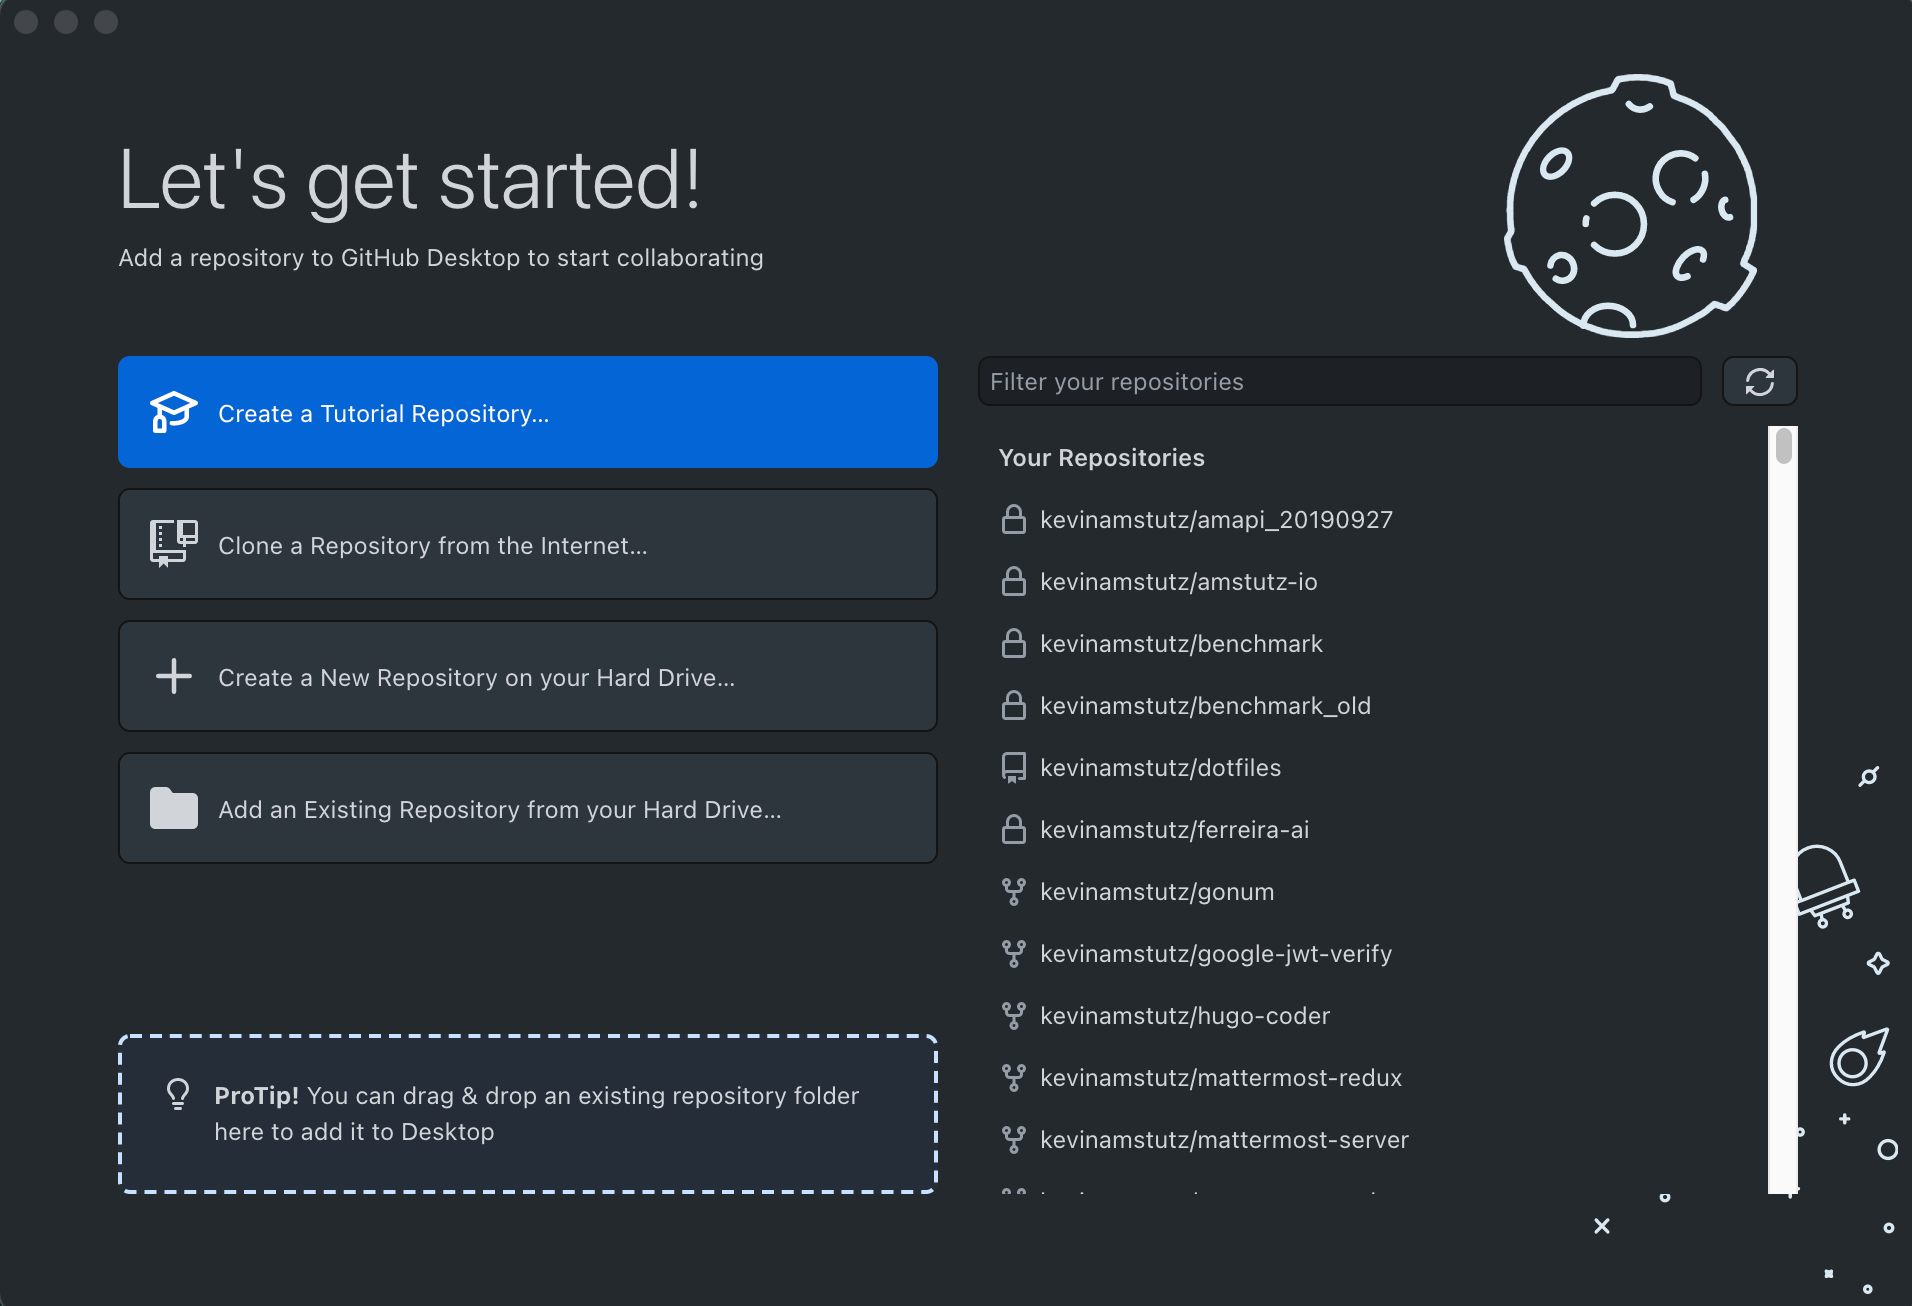
- When you are presented with the following screen, select "Clone a Repository from the Internet...":
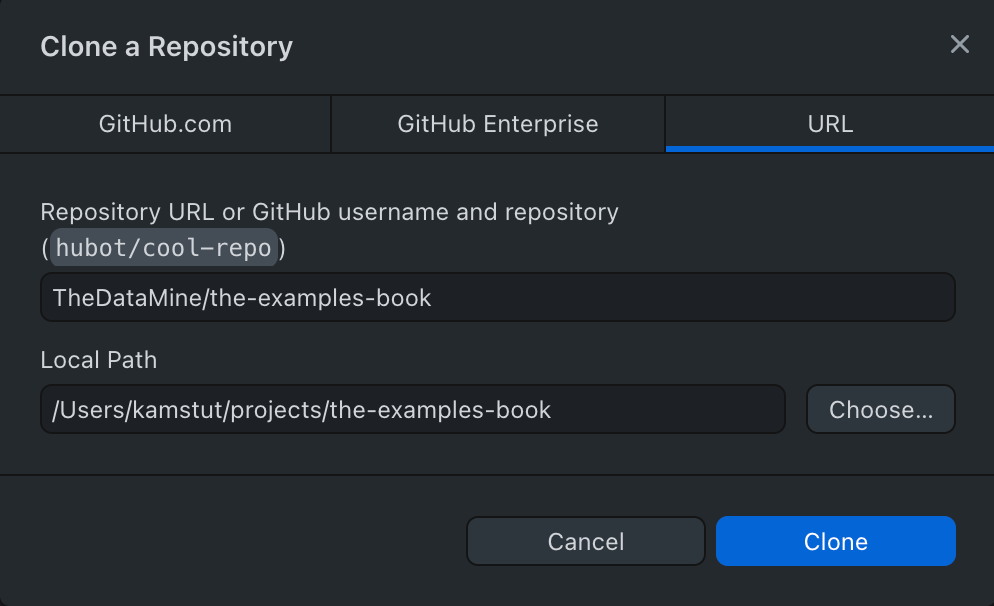
 3. Click on the "URL" tab, and fill in the first field with "TheDataMine/the-examples-book". In the second field, enter the location where you'd like the repository to be cloned to. Note that this directory must be an empty directory. In this example, the repository will be cloned into
 /Users/kamstut/projects/the-examples-book. The result will be that the folder, /Users/kamstut/projects/the-examples-book, will contain all of the files and folders from the repository. Click "Clone".
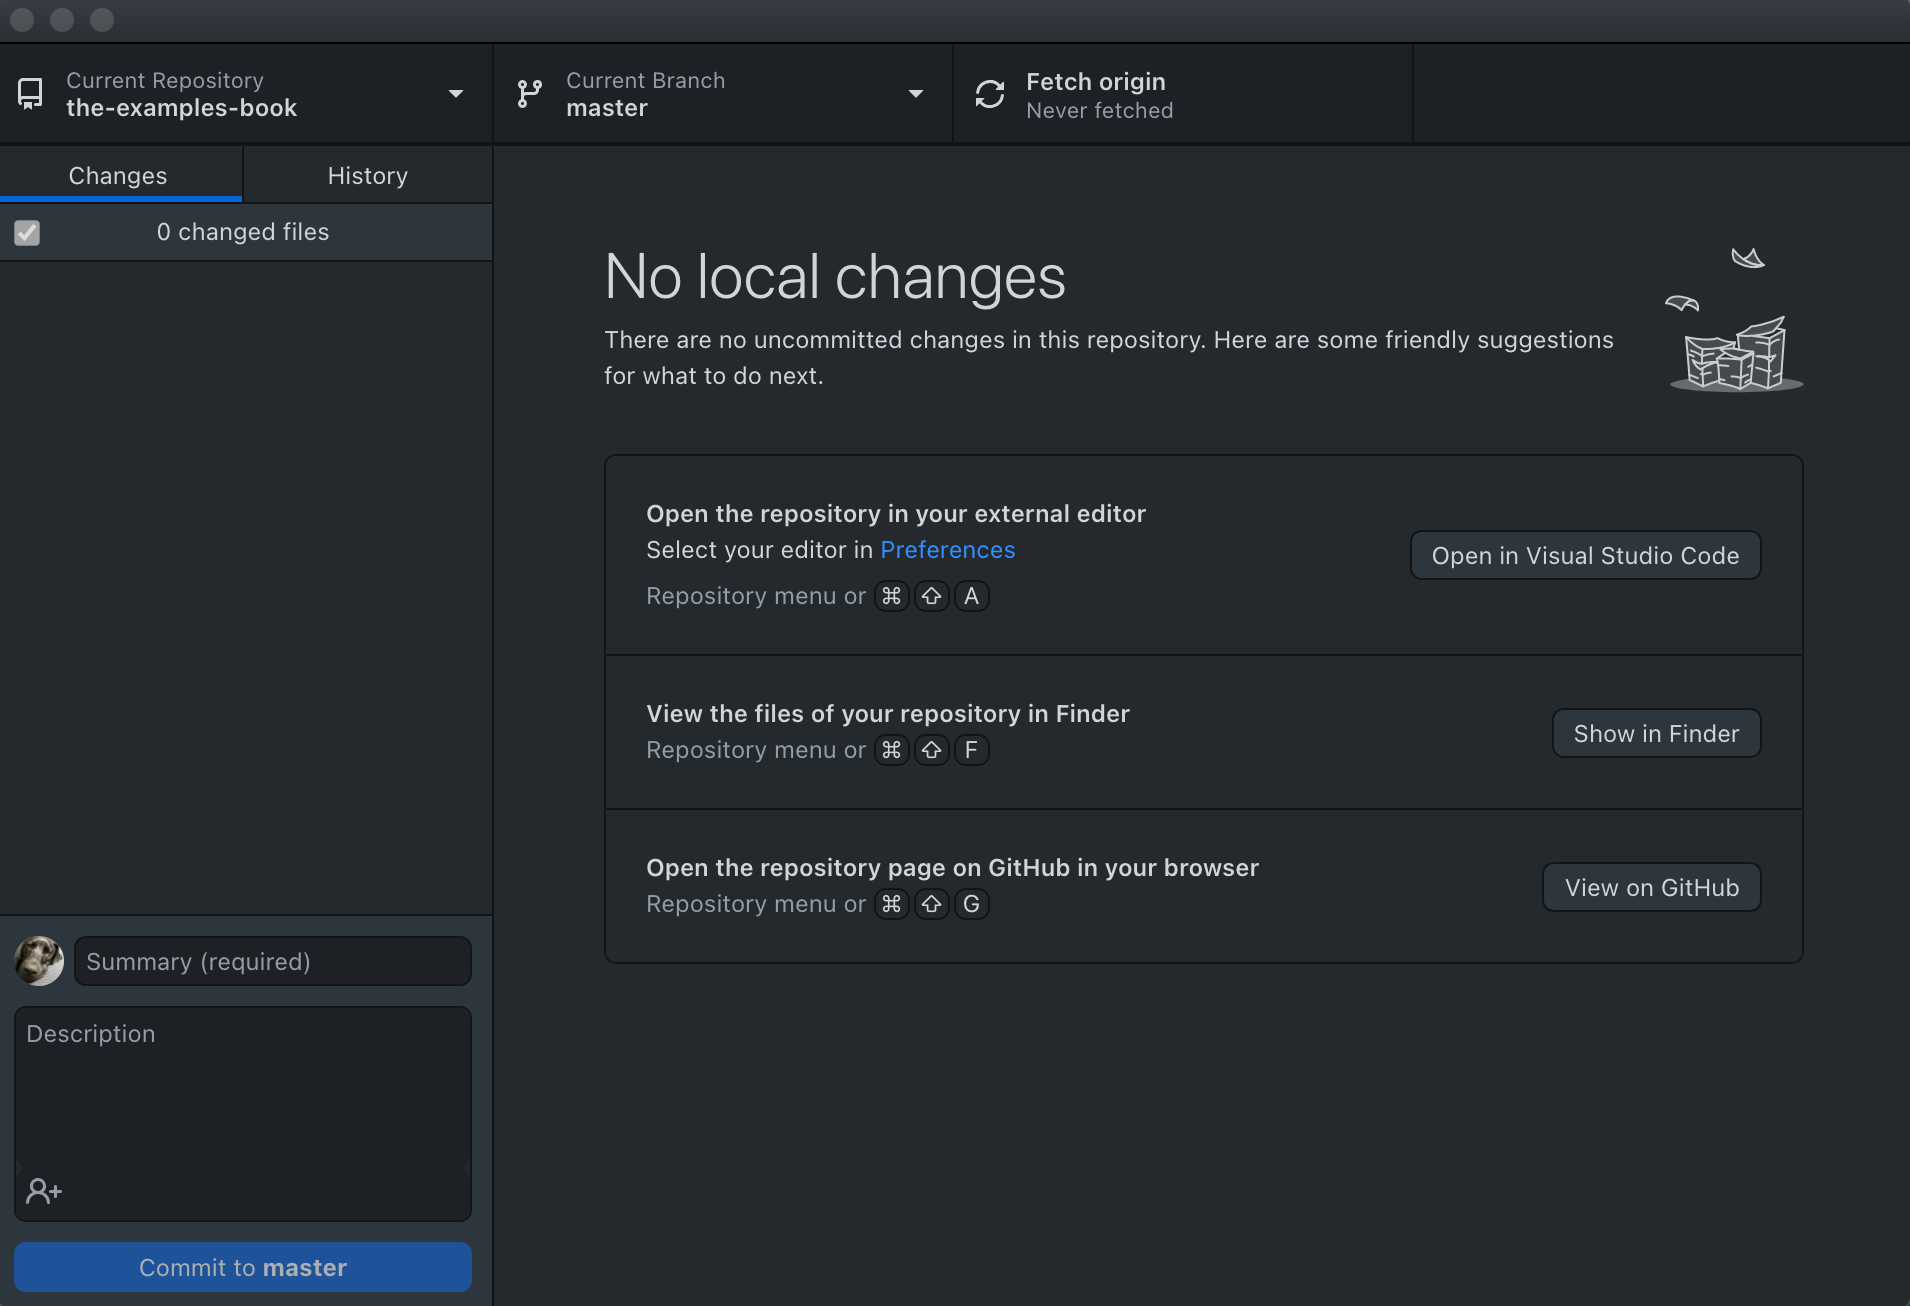
- Upon completion, you will be presented with the following screen. Congratulations, you've successfully setup GitHub Desktop and cloned The Examples Book repository.
Making a contribution
- At this point in time, your current branch will be the
masterbranch. Create a new branch with whatever name you'd like. For example,fix-spelling-errors-01oradd-fake-section.
Important note: Think of a branch as a copy of the repository. Typically, a new branch is created for each feature of a project. In the case of our book, this could be an article or a project. Changes are made to the files within the branch, committed, a pull request is made, the changes are reviewed, and then the branch is merged into the master branch (which holds our source of truth, final, or deployed code).
- Open up RStudio. Click on
File > Open Project..., navigate an click on the project folder, in this case,/Users/kamstut/projects/the-examples-book. Click "Open".
Important note:
There are currently 13 .Rmd files that can be modified to make additions or changes to the book:
index.Rmd01-scholar.Rmd02-data-formats.Rmd03-unix.Rmd04-sql.Rmd05-r.Rmd06-python.Rmd07-tools.Rmd08-faqs.Rmd09-projects.Rmd10-fall2020-projects.Rmd11-corporate-partners.Rmd12-contributors.Rmd
The content in the book starts in index.Rmd and continues sequentially, file by file. The preceding numbers indicate the order in which Bookdown will render the content. Each individual .Rmd file creates a single HTML file, and a top-level section of the book. If you wanted to add a section for Julia under the python section, for example, you would need to create a new RMarkdown file called 07-julia.Rmd, and rename the following RMarkdown files accordingly (08-tools.Rmd, 09-faqs.Rmd, etc.).
First level markdown headers starting with # are rendered into top-level menu items in the left-hand table of contents. Second level markdown headers starting with ## are rendered into secondary menu items nested beneath the preceding first level markdown headers. Similarly, third level markdown headers starting with ### are rendered into tertiary menu items nested beneath the preceding second level markdown headers.
In the following example, "First second level header" and "Second second level header" would be nested under "First level header", and "First third level header" would be nested under "First second level header":
# First level header

## First second level header

### First third level header

## Second second level header
At this time only the first three levels of headers are rendered in the table of contents. Level 4-6 headers only have a visual effect and automatic anchor links.
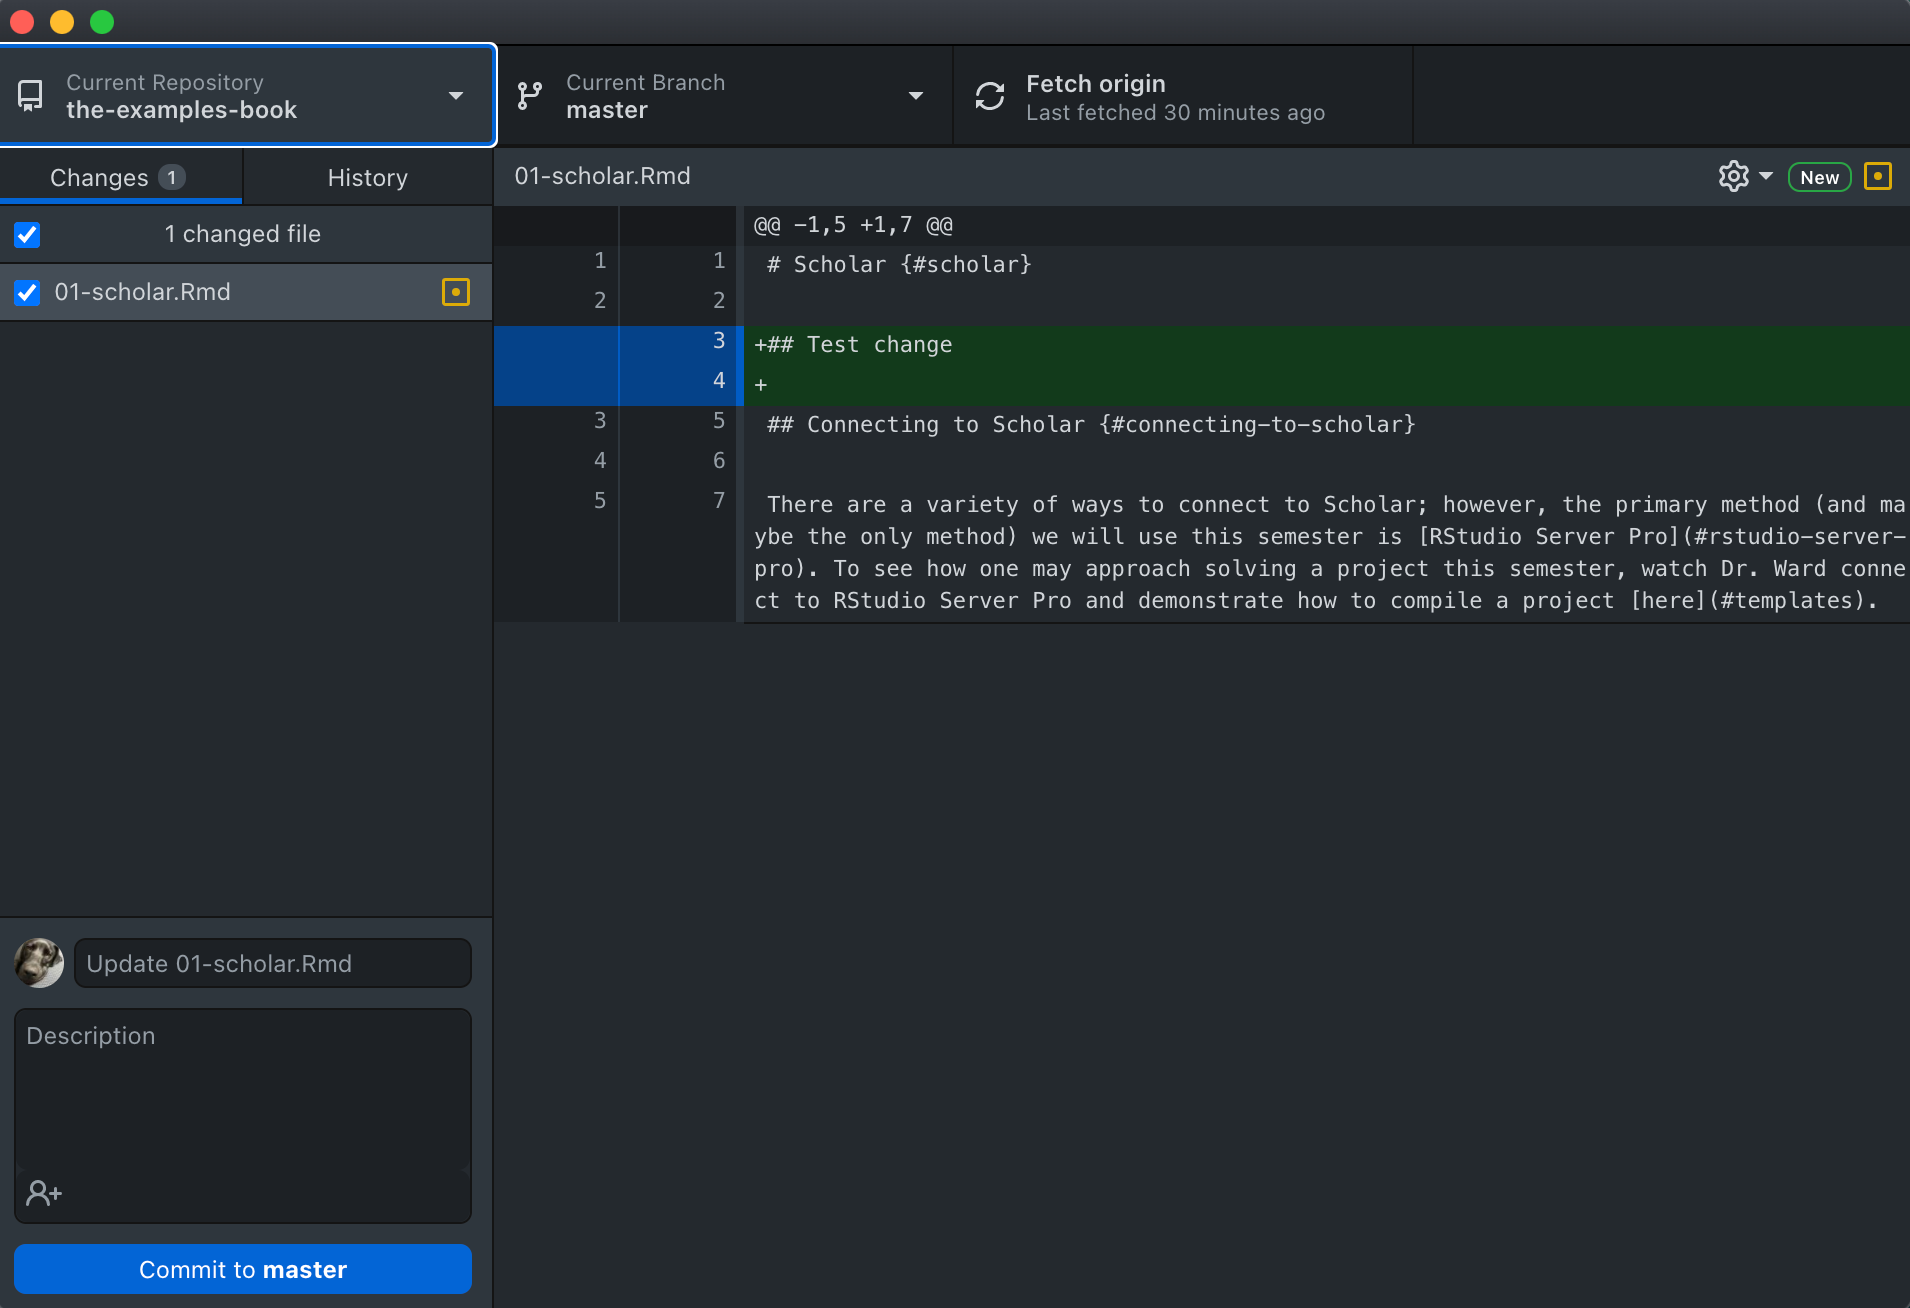
- Make modifications or additions to any of the 13+
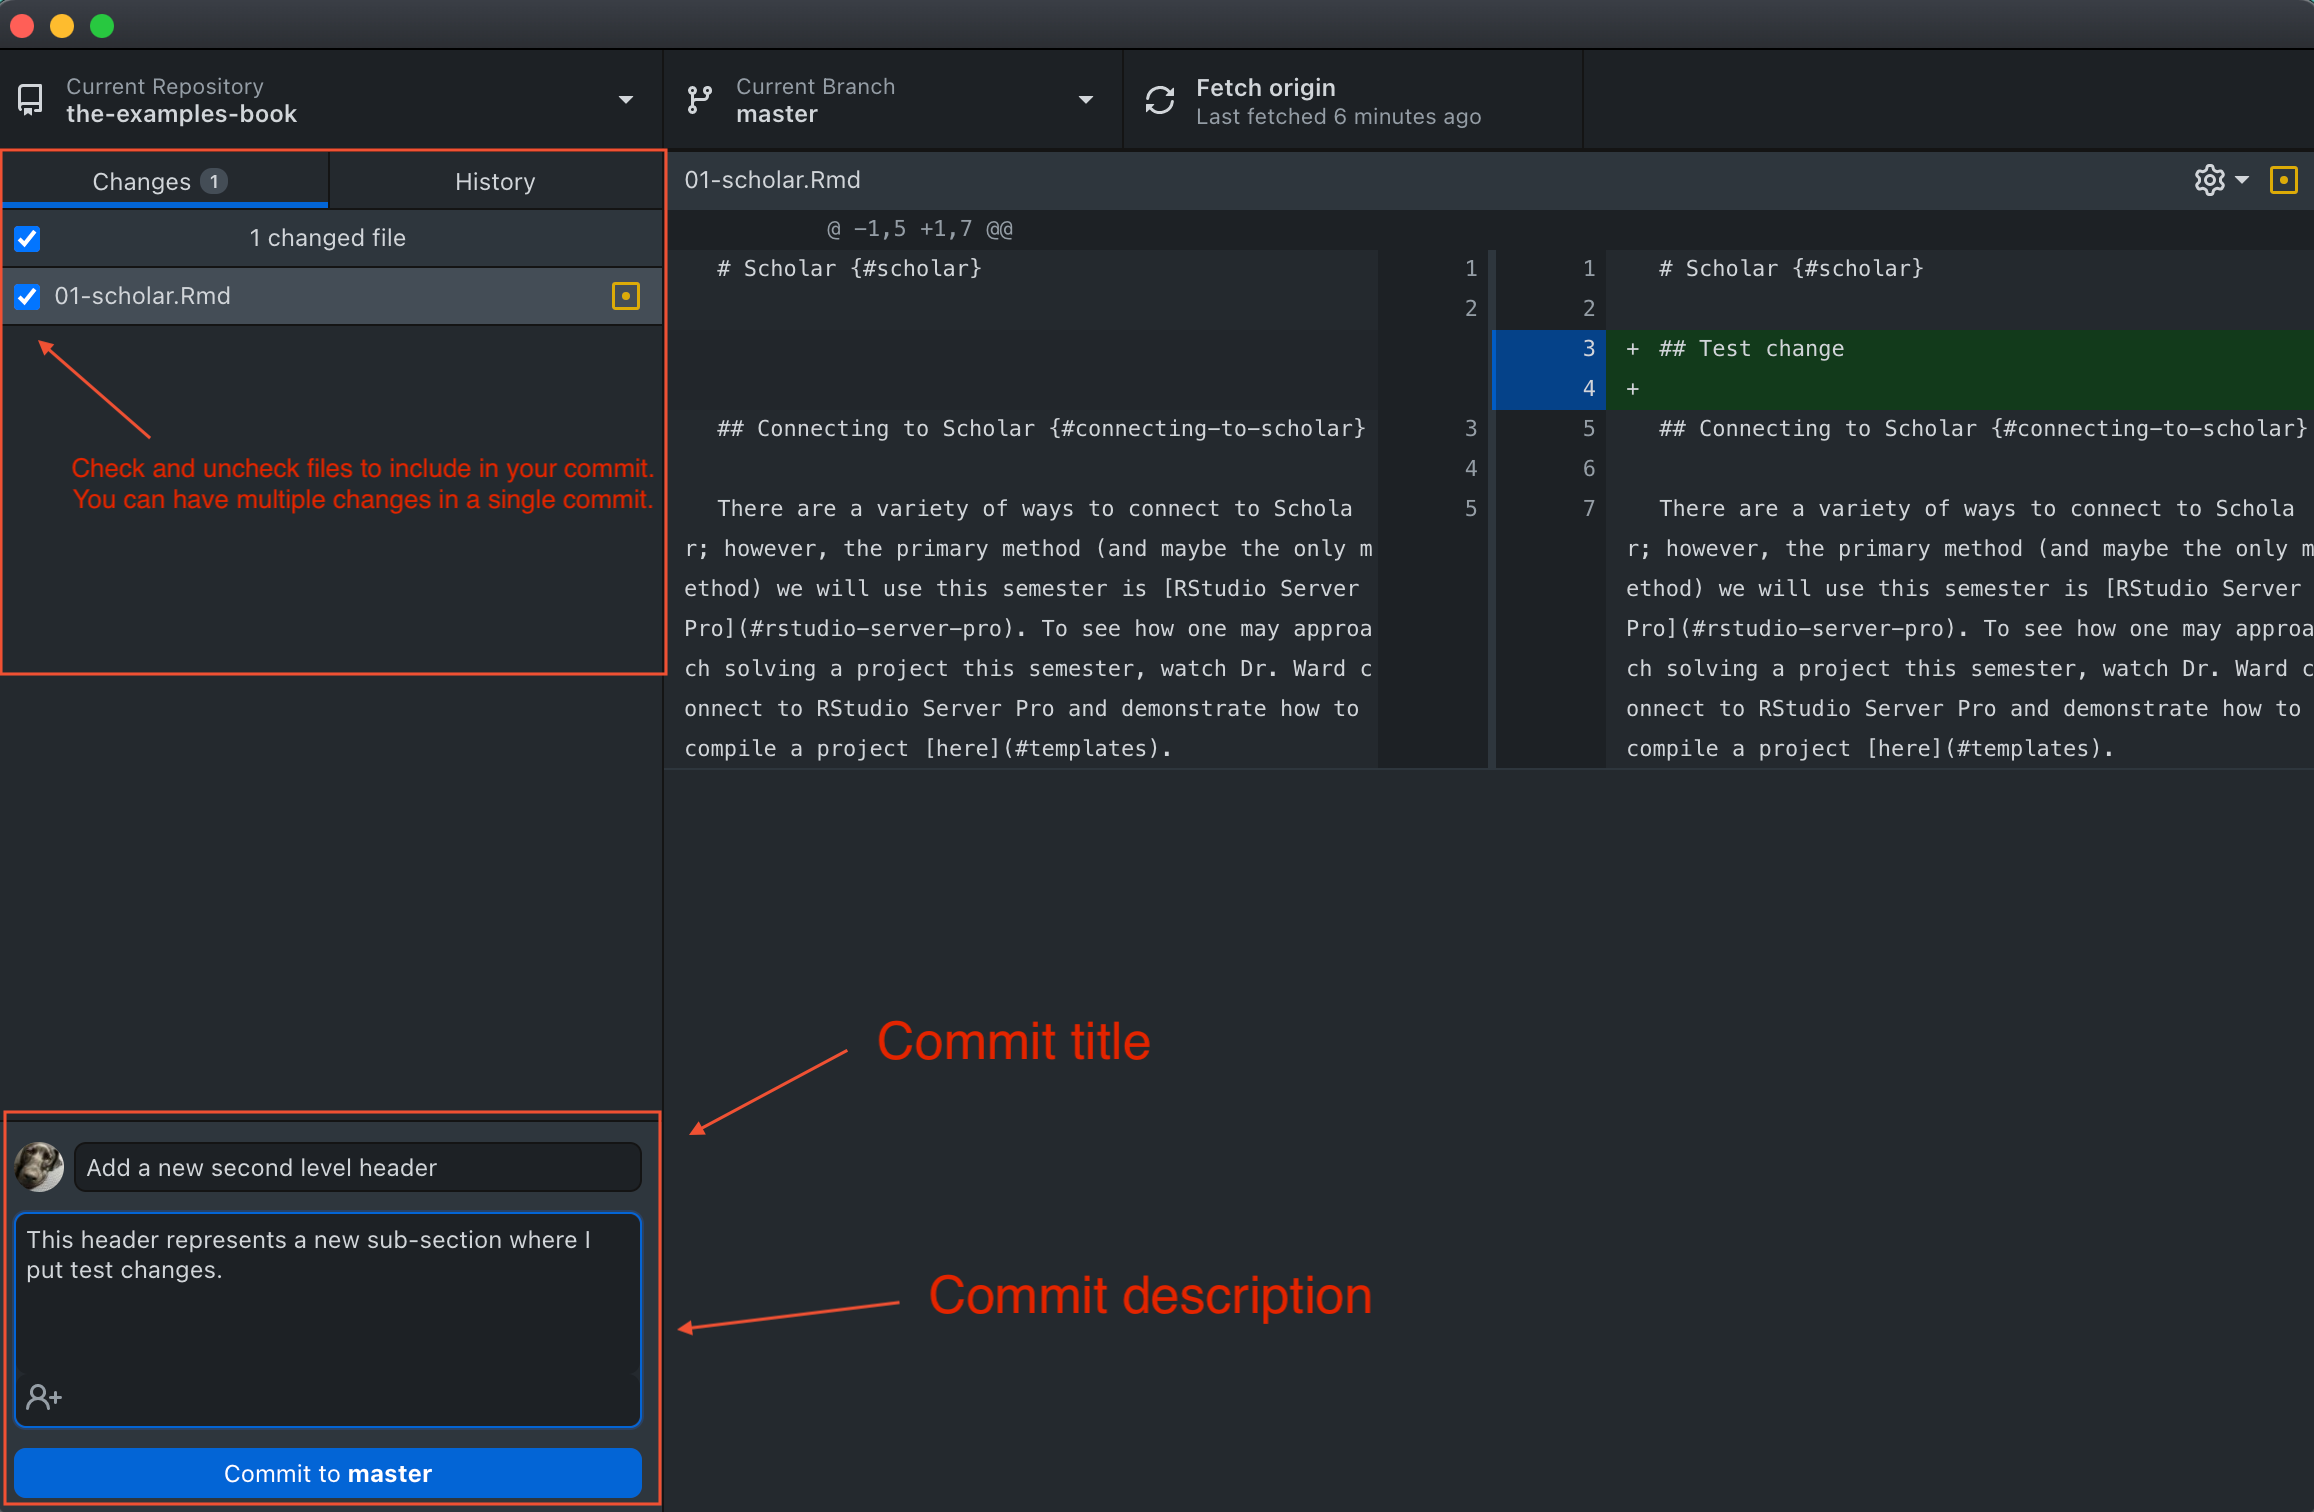
.Rmdfiles. As you make changes, these changes will be shown in GitHub Desktop. Here, we've made a single addition of## Test changeto01-scholar.Rmd.
- The next step is to commit your changes. Think of a commit as a local save that has an associated title (required) and description (optional). Here is an example.
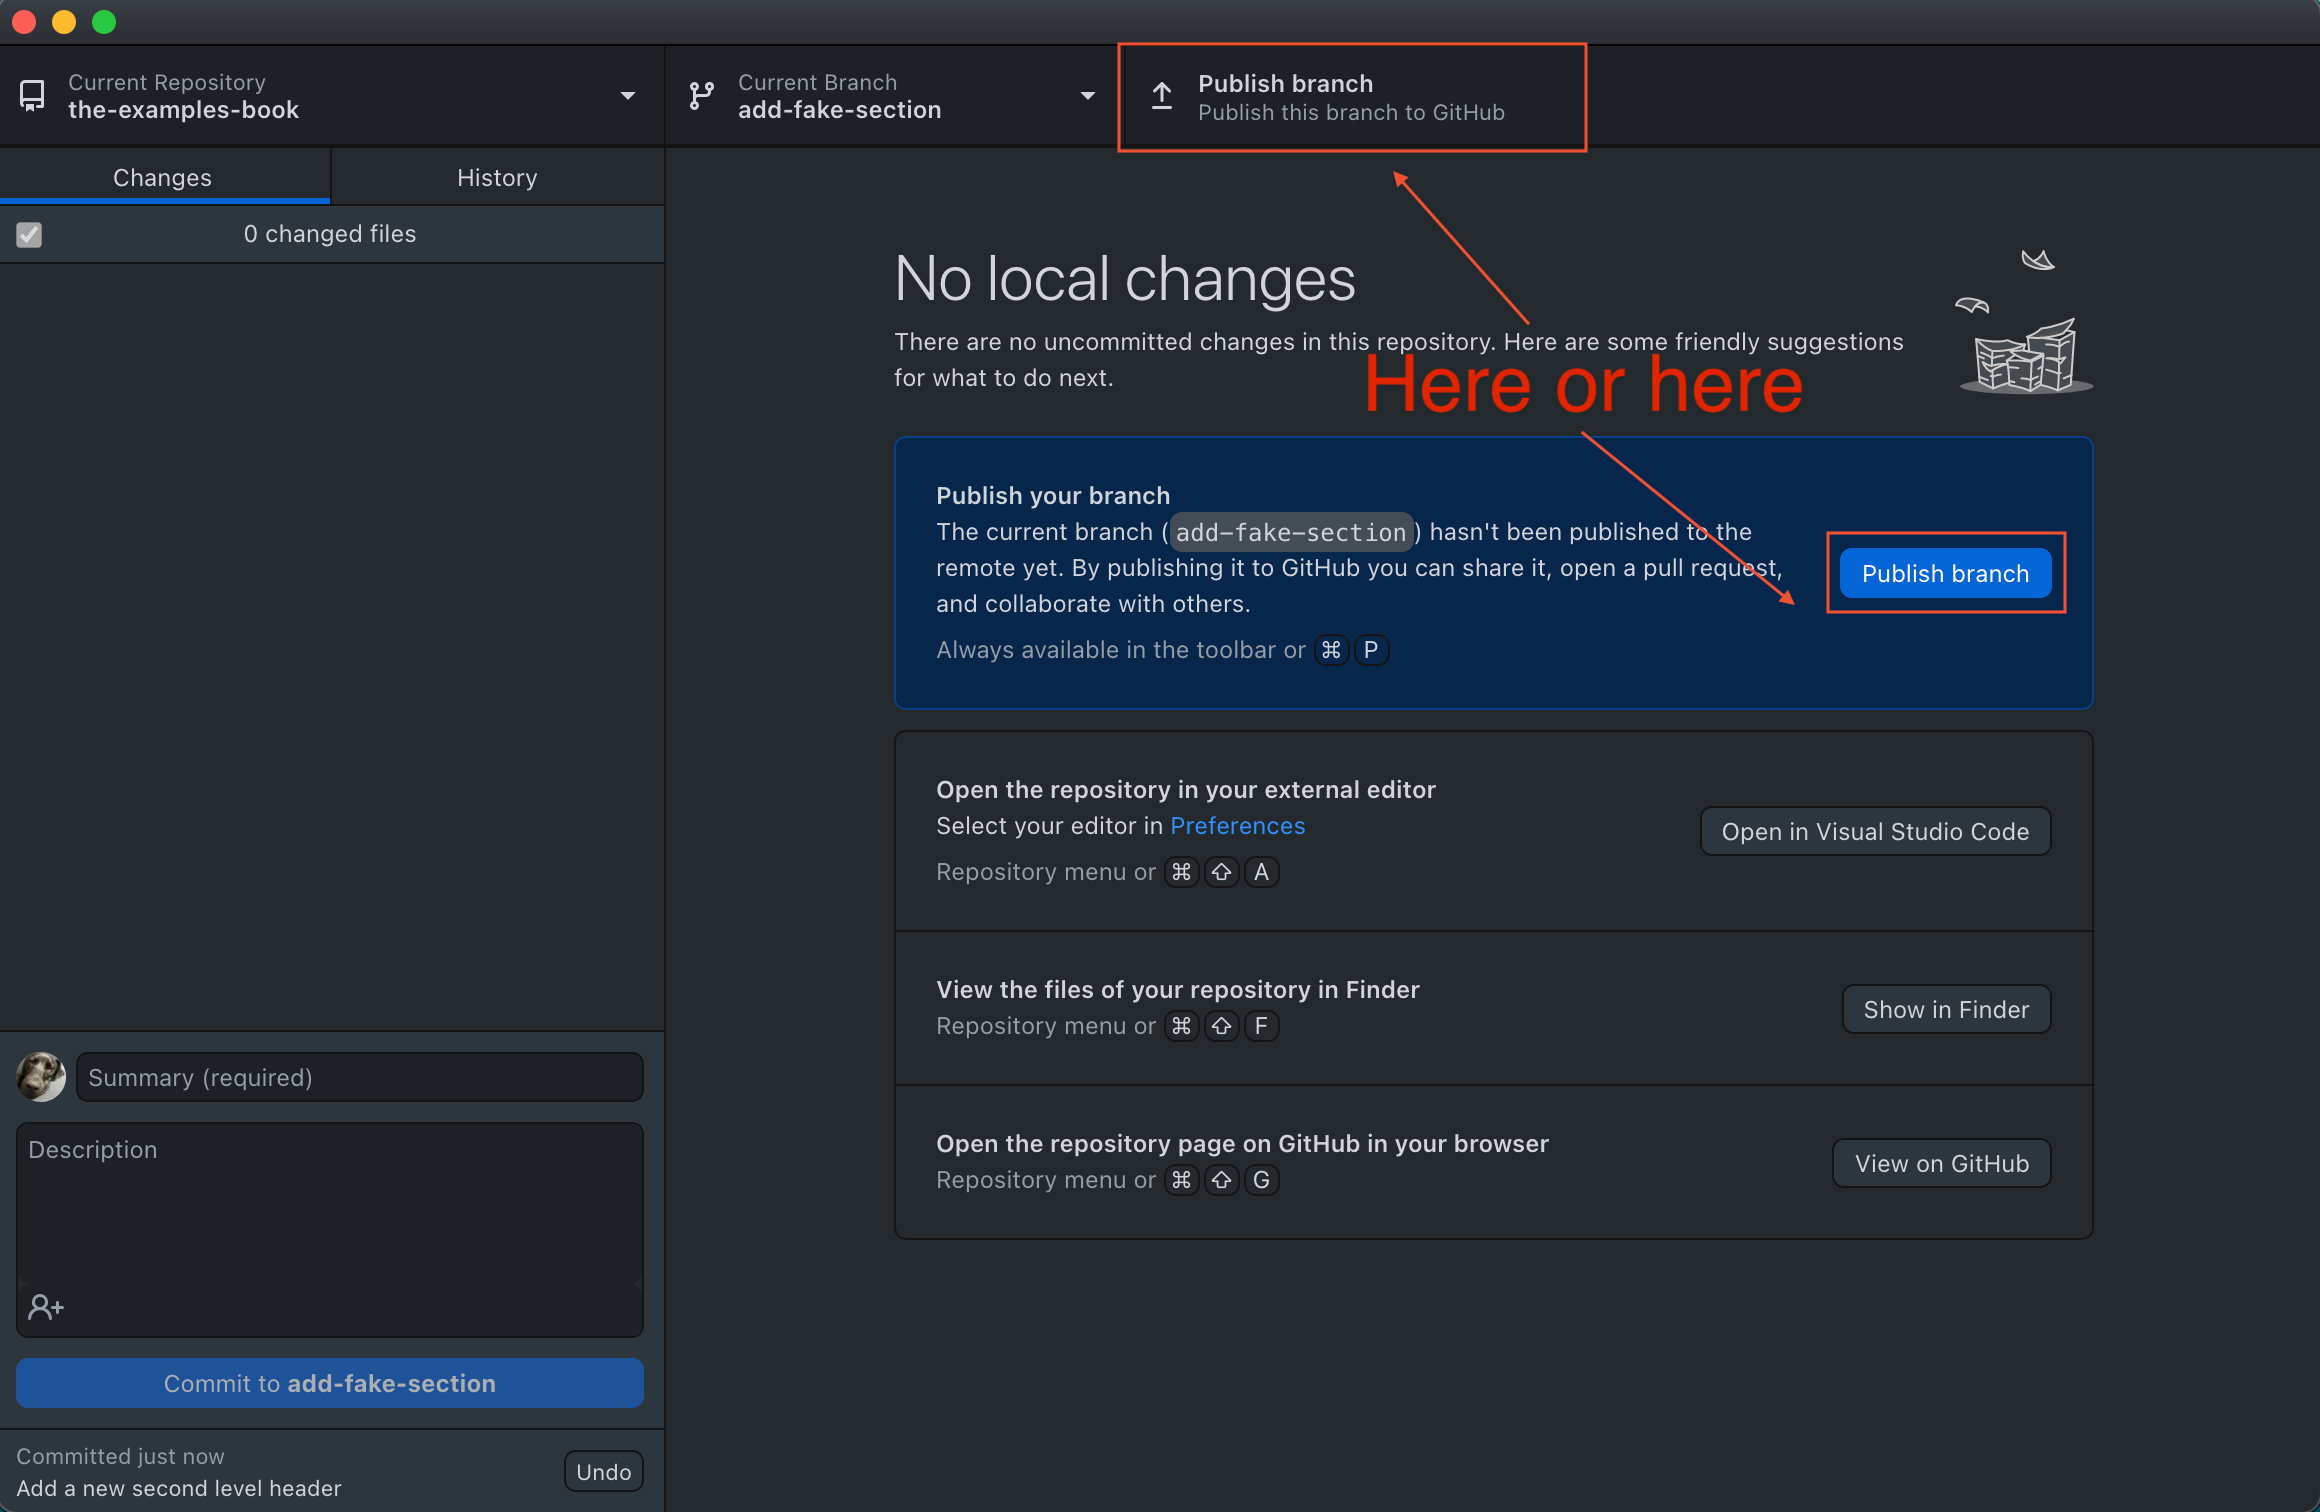
- Once you are pleased with your modifications, you need to publish your branch. To do so click on "Publish branch". This uploads your branch, in our case
add-fake-section, to our remote repository, or the repository that GitHub is hosting. What you are working on in your computer is referred to as your local repository. Typically, you will make changes to a local repository and push those changes to the remote repository.
Important note:
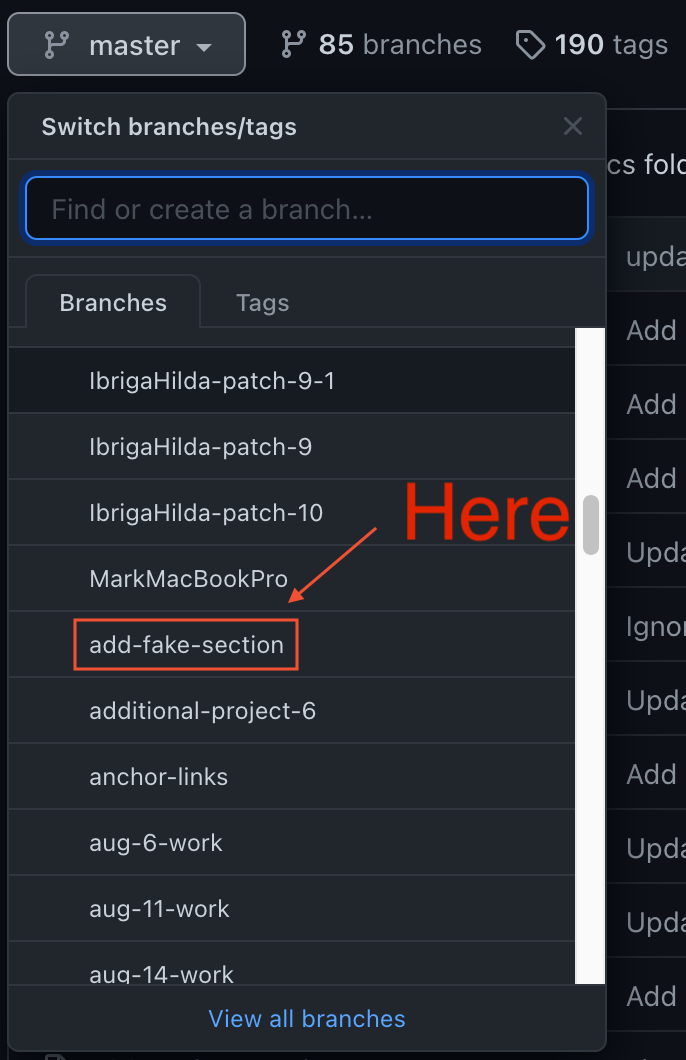
In fact, if you navigate to https://github.com/TheDataMine/the-examples-book, you will see that the branch, add-fake-section is now visible online.
- Excellent. The next step is to create a pull request. To do so, click the "Create Pull Request" button on GitHub Desktop. This should launch your browser and you should be presented with a page that looks similar to the following. On this page, you will be able to provide a title and description for the request. Note that the description is markdown friendly (clicking "Preview" allows you to see the rendered result). In addition, you can assign a reviewer, add labels, etc. At a minimum, you should add a title and description. Once satisfied, click "Create pull request".
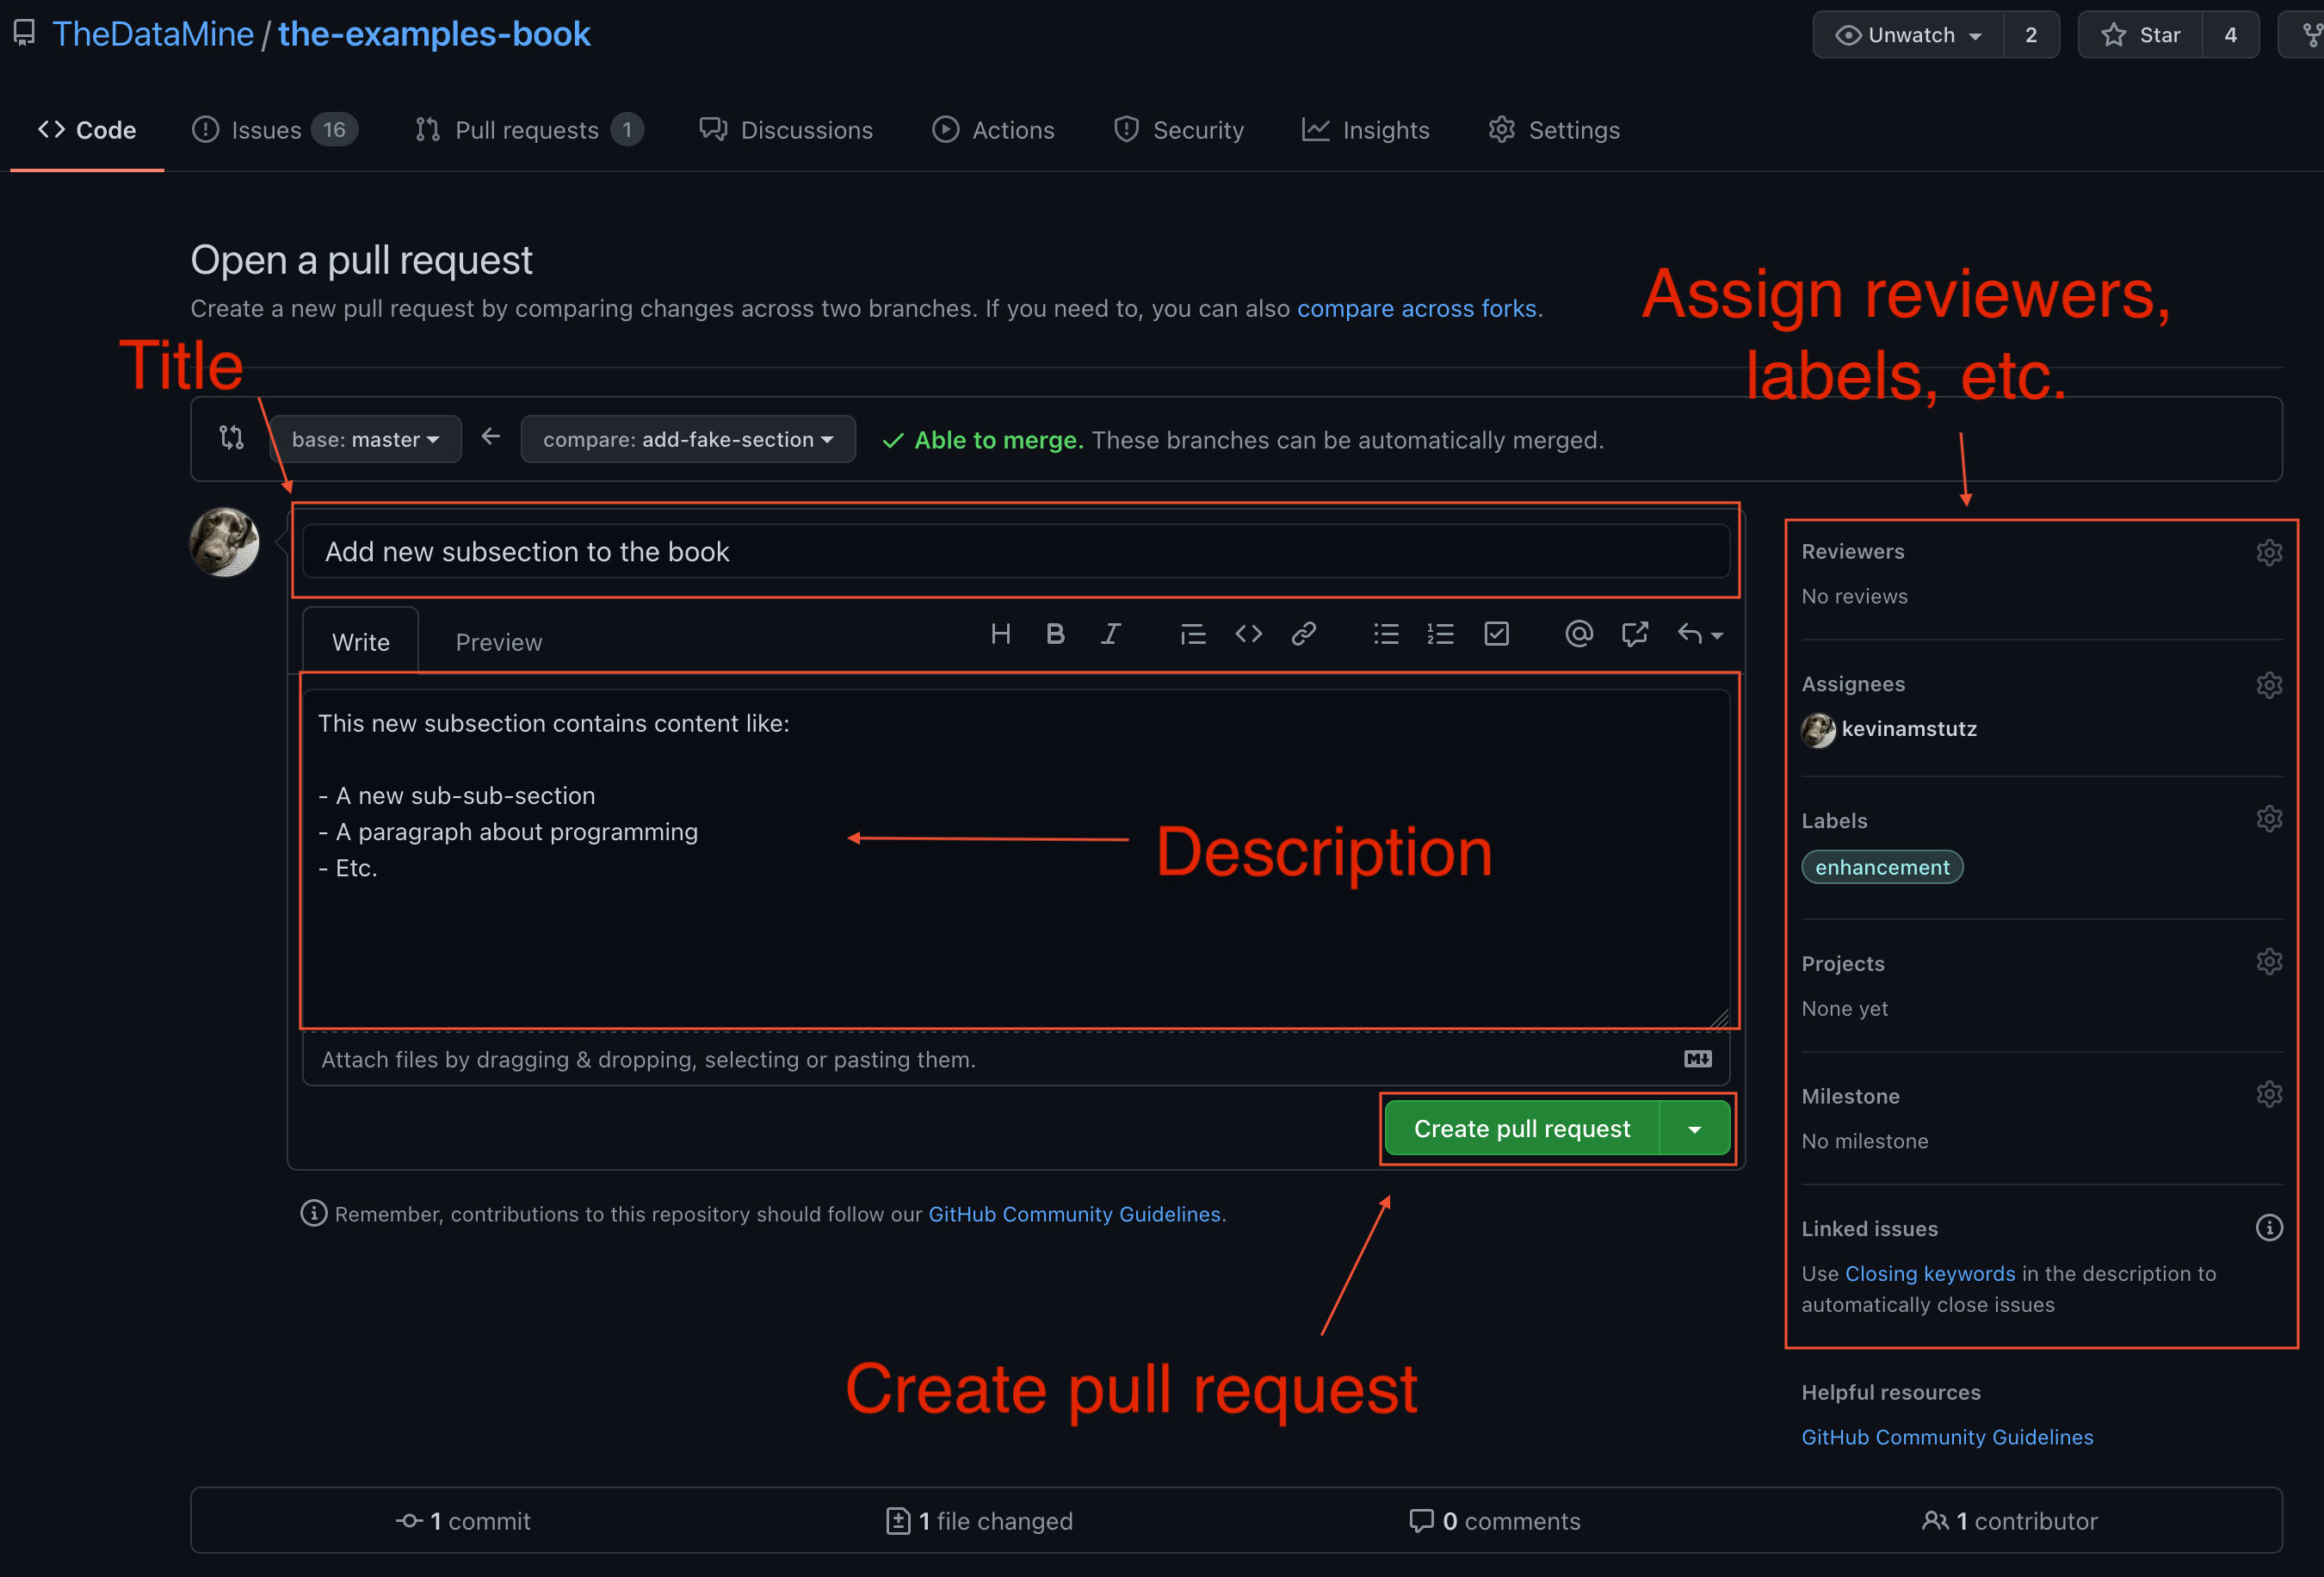
Important note: Prior to this terms like commit, branch, local, remote, etc., have been generic. Those terms apply to git, in general. A pull request is a GitHub specific term and not all git cloud providers use the same terminology. For example, GitLab uses the term merge request.
- At this point in time, the repository owner will be notified, changes will be reviewed, and eventually merged. Once merged, changes are launched to the website within about 10 minutes. Please note you can continue to make changes and commit to your branch at any time. Changes will automatically be included in your pending pull request.